
Temenos Lifecycle Management Suite - Origination Product Guide
How to Configure Merchant Lending
| Administrator Guide > Virtual Capture Overview > How to Configure Merchant Lending |
Merchant Lending (Vendor Portal) provides vendors with the ability to access vendor instances of Virtual Capture to create, submit, and view applications on behalf of their customers. Institutions have the ability to create multiple vendor instances of Virtual Capture, or configure one vendor instance, and determine which application types and instances each vendor is able to access.
In order to use this functionality, the following configurations must be made in System Management:
 |
If desired, institutions can author rules in System Management > Origination > Rules Management to automatically perform actions in an application from the Vendor Portal.
|
System administrators have the ability to create one or more vendor instances from the Virtual Capture Settings page in System Management (System Management > Origination > Virtual Capture > Virtual Capture Settings).
To create a Vendor instance:
 within the top of the Virtual Capture Settings page. The instance configuration window appears.
 to create the vendor instance.
 |
For more information on creating a Virtual Capture instance, and the parameters within each tab, please see the Virtual Capture Settings topic in this guide. |
In Vendor Management (System Management > Origination > Loan > Vendor Management), administrators are able to create and manage the settings for each vendor that their financial institution does business with, including the ability to grant a vendor, and their contacts, access to the vendor instances configured in Virtual Capture Settings. In order for the contacts at a vendor to create and submit applications through a vendor instance of Virtual Capture, the following configurations must be made in Vendor Management:
Vendor Portal Authentication credentials must be defined for each contact at a vendor who is to have access to the vendor instances of Virtual Capture. These credentials are set within the Contacts tab in Vendor Management.
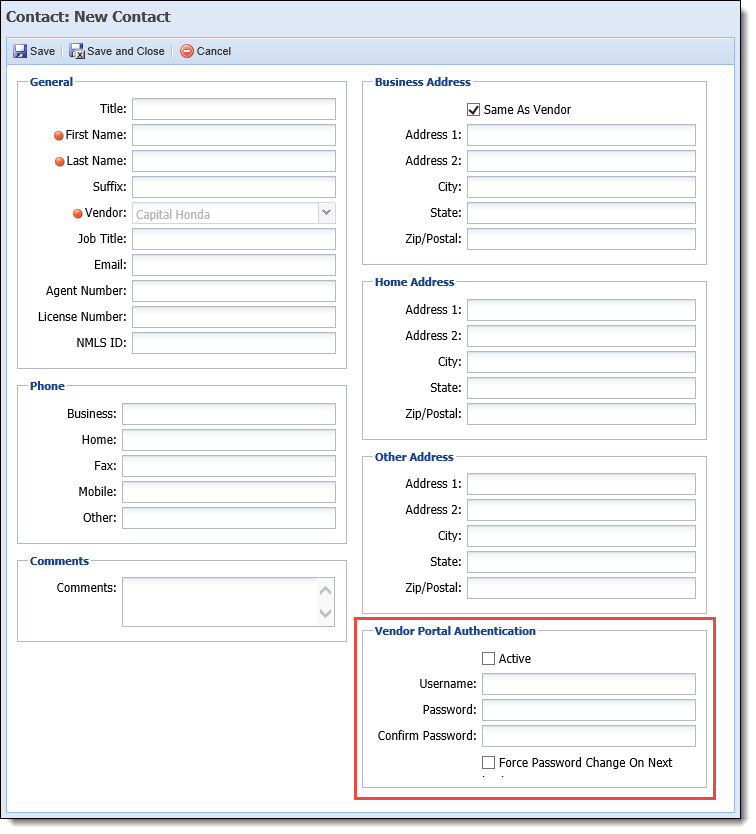
To define the credentials for a vendor contact:
 |
The username for each contact must be unique across all vendors; therefore, if the value entered for the username matches that of another vendor contact, an error is received when trying to save the contact. Additionally, when the Active check box is selected within the Vendor Portal Authentication section, the username must contain a value, or an error is received upon saving the contact details. |
. |
For more information on the Contacts tab, please see the Contacts section of the Vendor Management topic in this guide. |
In addition to defining credentials for vendor contacts, system administrators must also determine which vendor instances and products a vendor can access in Virtual Capture. These configurations are made within the Vendor Portal tab in Vendor Management.
This tab includes the following two-box controls, which allow administrators to assign a vendor access to specific instances and products in Virtual Capture.
| Attribute | Description | ||||
| Virtual Capture Instances | |||||
| Available Virtual Capture Instances |
Displays a list of the Virtual Capture instances to which the vendor can be assigned. This list includes all active instances configured in System Management > Origination > Virtual Capture > Virtual Capture Settings that have an Instance Type of Vendor, and do not use the Login settings of another instance.
To assign an instance to the vendor, select the desired instance from the list, and move it to the Assigned Virtual Capture Instances box using the arrows, or by dragging and dropping the value.
|
||||
| Assigned Virtual Capture Instances |
Displays a list of the Virtual Capture instances that a vendor is permitted to access.
|
||||
| Application Types | |||||
| Available Application Types |
Displays a list of the loan application types and account products used to create a product for Virtual Capture in System Management > Origination > Virtual Capture > Virtual Capture Products.
To assign an application type to the vendor, select the desired product from the list, and move it to the Assigned Application Types box using the arrows, or by dragging and dropping the value.
|
||||
| Assigned Application Types |
Displays a list of the products that can be accessed by the vendor in Virtual Capture. Once the vendor is saved, the products in this list are available for selection by the vendor when a new application is created in an assigned instance of Virtual Capture.
|
||||
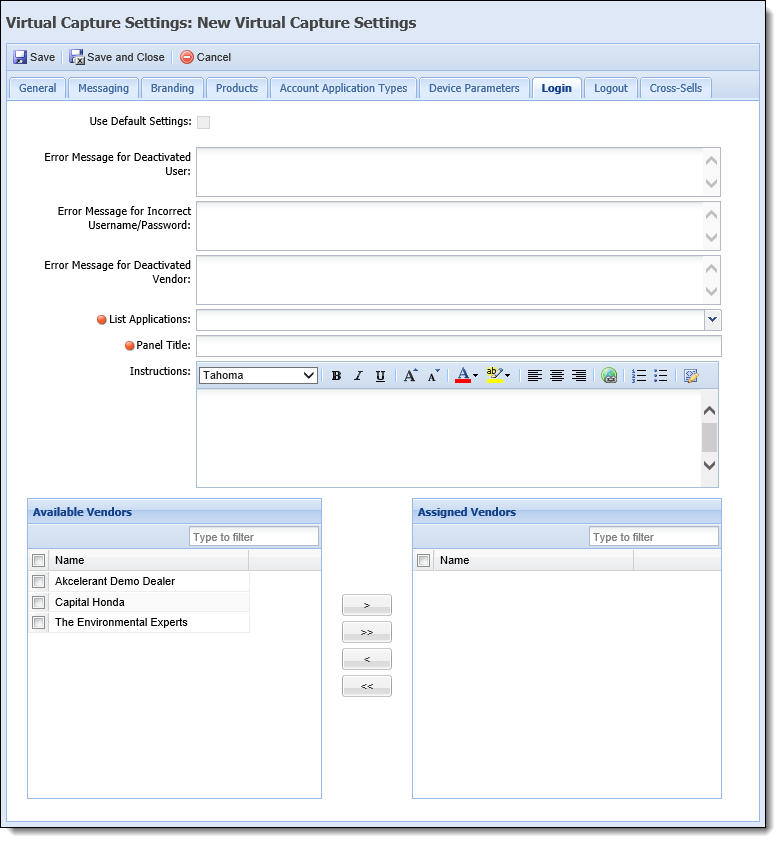
The Messaging tab in Virtual Capture Settings (System Management > Origination > Virtual Capture > Virtual Capture Settings) includes the several parameters that enable institutions to customize the information that appears within the Application Listing page for each instance. The following parameters are only available when the Instance Type is set to Vendor for the instance:
| Virtual Capture Setting | Description | ||||
| Show Application Queue Name |
Provides the ability to display the name of the queue to which an application is assigned in the Application Listing page for a vendor instance. |
||||
| Default Queue Name |
Provides the ability to define the default queue name to populate within the Application Listing page for queues not configured to display their queue name in the Vendor Portal.
|
||||
| Days to show withdrawn applications |
Provides the ability to define the number of days that an application displays within the Virtual Capture Application Listing Page for a vendor instance. If set to “0," withdrawn applications are not able to be accessed in the Application Listing page. |
|
For more information on the above settings, please see the Messaging section of the Virtual Capture Settings topic in this guide. To learn more about the Application Listing page in a vendor instance, please see the Application Listing topic in this guide. |
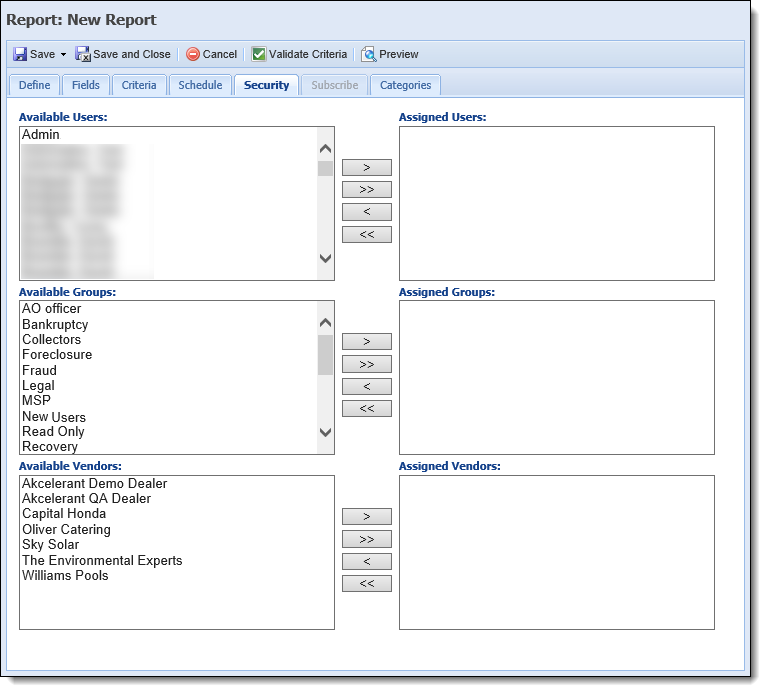
If desired, system administrators can configure reports that are tailored to specific vendors, and can be accessed by the vendors in a vendor instance of Virtual Capture.
Vendor reports are configured within the Reports page in the Ribbon Bar, by setting the Vendor Report parameter to true in the Define tab of the report configuration window. This parameter is set to false by default, and is only enabled for Application type reports.
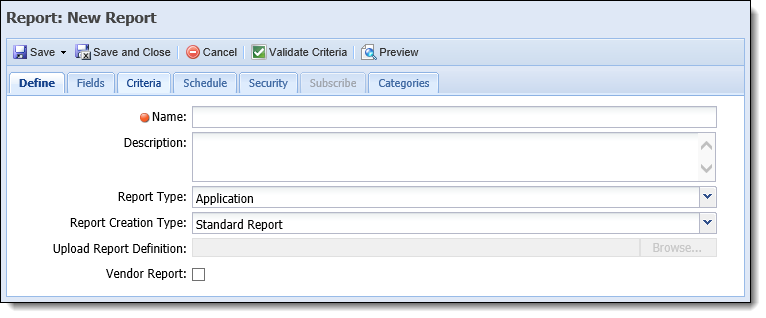
When set to true, a two-box control populates within the bottom of the Security tab to provide the ability to assign specific vendors to the report:
The report also populates as an available option to assign to a vendor within the Vendor Portal Reports tab in Vendor Management:
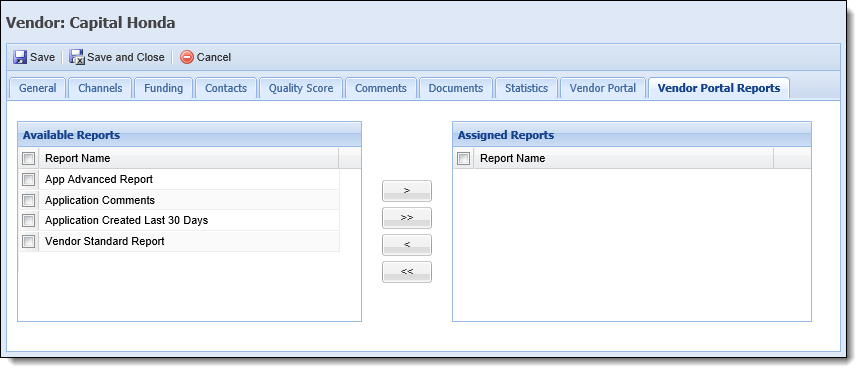
Once the report is assigned to a vendor, the contacts for the vendor are able to access and run the report during the virtual application process.
|
For more information on configuring and assigning vendor reports, please see the Reports Administration topic in this guide, and/or the Vendor Portal Reports section of the Vendor Management topic. |
